Building a Setter for my Woodmizer Saw Blades
- Bill Stuewe
- Jan 5, 2017
- 3 min read
In order for a saw blade to cut wood efficiently the teeth must be "set" properly. Straight teeth in a saw will cut a groove or "kerf" the same thickness as they are wide, which is the same thickness as the body of the blade and as the blade cuts deep into the wood a lot of friction would build up. To overcome this, alternating teeth are bent or "set" one to the right and one to the left a slight but equal amount. This widens the kerf and greatly lessons the friction and therefore the heat build-up in the band. I could buy one for about $1500 but I chose to spend a day in the shop "fabricating" instead. All of the materials used were things I already had on hand. Also I offer up a disclaimer that I am a woodworker not a welder, so no comments on my welding beads or the overall look of this contraption. It may not look first class but it does work very well.

I started with a 8" x28" x 3/8" plate steal that I had and then cut two pieces of 1" square stock about 4" long. I drilled two 1/4" holes in one and fastened it to the steel plate by drilling and tapping it The other piece of square stock was drilled with two 3/8" holes and fastened with two 1/4" bolts drilled and tapped as shown above, allowing it to move in and out by 1/8". I welded a 1/4" coupler nut to each of the square bars one inch apart as shown. Quarter inch bolts with lock nuts were then screwed in and adjusted so that when they are clamped against the band the tips of two alternate teeth will be pushed over approximately 20 thousandths of an inch, which is the required set for my saw blade.
I then drilled and tapped a 5/16" hole in the center of the movable block parallel with the base plate and coupled this 5/16" bolt to a push clamp that I had so that it could be calibrated such that at the full push the movable bar would be pushed tight clamping the band between the two bars and setting the two opposing teeth.

The next step was to build and attach a ratchet lever system on the right side to advance the saw blade the exact right amount to position the next two teeth to be set opposite each bolt ready for the next push of the clamp to set two more teeth. The set pattern on my bands is such that a tooth is set to the right, the next to the left, the next is not set (it is called a raker as it is left straight to pull, or rake, the sawdust out of the middle of the kerf) then the pattern repeats itself, right, left, straight, right, left, straight and so on around the blade.

A two handed rhythm is established such that it takes less than two minutes to set all the teeth in a band

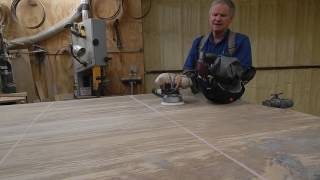
When I got the sawmill it came with a sharpener which I cleaned up and started using. While I am setting a band I have another band soaking in a solution of 50/50/ water and Simple Green degreaser. Once I have a band set it is ready for the sharpener. It takes a bit to get everything set up on it to sharpen each blade Once it is adjusted and going it will sharpen the band automatically. I place a small magnet where I start and when all the teeth have been sharpened the magnet shuts off the sharpener. As soon a I get the sharpener adjusted and going I remove the band from the soak and put another one in to soak. I take the soaked band, uncoil it and using a wire wheel on my drill I clean the pitch buildup and rust from both sides of the band and then put it on the setter and set the teeth.. By this time the sharpener is usually stopped and I remove that blade and put the one I just set on the sharpener and get it going. I then wipe down and oil the newly sharpened band, coil it and put it in the box--Done! I then repeat the process. I usually average about 4 bands per hour.

The sharpener---


Can u help me to bulid that thing .. am in africa tanzania